
How to Prevent Termites in New Construction (2026 Guide)
Learn how to prevent termites in new construction with proven 2026 strategies. Discover termite-proof building materials, step-by-step prevention tips, and essential design features to keep your new home safe from costly infestations.
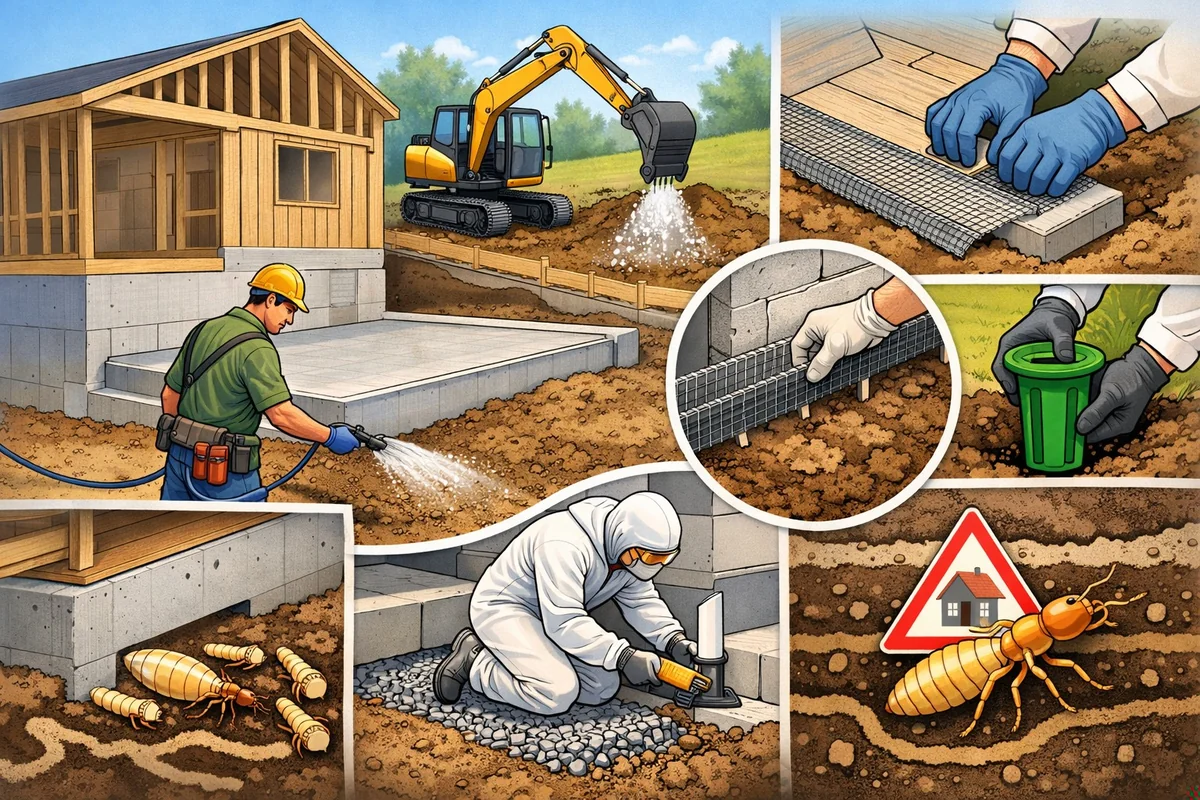
To prevent termites in new construction, treat soil with termiticide before pouring the foundation, use termite-resistant materials, install physical barriers, and ensure proper grading and ventilation. This process adds a few days to the build but can stop infestations for years. Early prevention is key - retrofits are far more expensive and less effective.
Why Termite Prevention Starts Before Building
Termites are relentless. By the time you notice visible damage, a colony could have been feeding on your new home for years. The mistake most builders make is underestimating how fast and quietly termites move in - especially during the construction phase when wood, soil, and moisture are everywhere.
How Termites Invade New Homes
Subterranean termites, the most destructive type in most regions, enter through foundation cracks as small as 1/32 inch or wherever wood touches soil. Even a single missed gap can become a highway for a colony.
Early-stage infestations are nearly invisible. Termites feed from the inside out, often leaving paint or drywall untouched while hollowing out studs and beams. If you don't build in protection, you might not catch the problem until repairs cost thousands.
Construction debris, like scrap wood left near the foundation, acts as a magnet. Moisture from poor drainage or unsealed crawl spaces gives termites the environment they need to thrive.
Long-Term Costs of Skipping Prevention
Most homeowners delay prevention because it adds time and upfront cost. But remediation can cost 10x more than prevention. We're talking not just chemical treatments but replacing entire sections of framing, subfloors, or even tearing out finished walls.
As of 2026, almost no standard homeowners policies cover termite damage. Insurers have seen too many claims - if you skip prevention, you're rolling the dice on a personal check covering the repairs. And those repairs almost always involve demolition, not just patching visible wood.
Think of termite prevention as an insurance policy you control, not a luxury. For more on treatment options if you already have a problem, see our Best Termite Treatments and Baits 2026 guide. If you're planning a build, though, prevention is always cheaper and less invasive than treatment after the fact.
Choosing Termite-Resistant Materials
The materials you choose at the start determine how vulnerable your home will be in the future. Some standard construction materials are practically an open invitation to termites, while others put up a fight for decades.
Pressure-Treated Lumber vs Traditional Wood
Pressure-treated lumber is infused with chemicals like copper azole or alkaline copper quaternary. These compounds deter termites and slow decay - making this lumber the go-to for ground-contact framing, sill plates, and decks.
Standard, untreated wood offers no defense. Termites will tunnel and feed on it as soon as they find contact with soil or moisture. For high-risk zones (like crawl spaces or stem walls), always spec pressure-treated materials even if code doesn't require it.
One caveat: chemical treatments can leach out over time. After 10-15 years, the protection may drop off, especially if the wood is exposed to consistent moisture. Ongoing inspections are the only way to catch issues before they spread.
Concrete, Steel, and Engineered Products
Concrete and steel framing are naturally termite-proof because they're inorganic - termites can't eat or tunnel through them. Using these for foundations, support beams, or even wall studs in high-risk regions is a major upgrade, albeit with higher upfront cost.
Engineered wood products with borate treatment are another solid option. Borates repel both termites and fungi, giving you two layers of protection where moisture is a concern. However, these materials require precise installation and may not fit all budgets or architectural styles.
Choosing these materials is a trade-off between initial investment and long-term peace of mind. If you're building in an area known for heavy termite pressure, the extra cost is almost always justified.
For a full overview of modern termite control strategies and how they complement material choice, refer to our Termite Control resource.
Site Preparation and Grading for Termite Control
How you prepare your construction site is just as critical as your material choices. The soil, grading, and drainage around your foundation set the stage for whether termites can gain access - or are stopped before they start.
Proper Soil Treatment Before Foundation Pour
Soil-applied termiticides create a chemical barrier that blocks subterranean termites from reaching the foundation. Pre-construction application is far more effective than trying to treat after the house is built - it's your chance to get full, even coverage without obstacles.
The best practices are to apply termiticide after grading but before forms or footings are set. The chemical needs to bond with undisturbed soil for maximum longevity. If you skip this step or use subpar chemicals, expect protection to last only a few years, if at all.
Some states mandate this treatment by code, but even where it's optional, it's a must for termite-prone areas. Be sure to get documentation of the product used and application method - this is critical for builder warranties and future resale.
Grading and Drainage to Prevent Moisture
Termites love moisture. Poor grading that lets water pool near the foundation increases the risk of both wood rot and termite infestation. Always slope soil away from the house by at least 6 inches over the first 10 feet.
Dry soil is your ally. Even the best chemical barriers are less effective if you have standing water or saturated mulch next to your slab. Plan landscaping so that water drains away and gutters discharge well clear of the foundation.
Hidden moisture zones - like low spots under decks or behind bushes - are a common reason termite barriers fail. Fix these issues before building, not after.
Design Features That Deter Termites
Beyond chemicals and materials, your actual house design matters more than you'd think. Details like how you separate wood from soil, ventilate crawl spaces, and install physical barriers all influence whether termites can sneak in undetected.
Physical Barriers: Mesh, Shields, and Gaps
Stainless steel mesh and metal termite shields are physical deterrents installed at slab edges, under sill plates, and around pipe penetrations. They force termites to build visible mud tubes on the outside, tipping you off before damage starts.
Installation must be flawless. Even a 1/16 inch gap lets termites through. Focus on corners, utility entries, and seams - inspect every inch before closing up with concrete or drywall.
If you're adding these after framing, it becomes difficult and often leaves weak points. Get it right during the build, or you'll pay for it later.
Minimizing Wood-to-Soil Contact
No matter how good your barrier is, if wood framing touches soil, termites have a direct path. Raising the bottom plate above grade and using a concrete or masonry stem wall creates a physical break.
This is a detail many builders skip to save time, but it's one of the simplest and most effective termite prevention tips. Retrofitting after construction is rarely cost-effective, so plan for it upfront.
Decks, steps, and landscaping timbers should follow the same principle - no direct wood-to-soil contact, ever.
Ventilation and Moisture Control
Crawl spaces and basements trap humidity. Good cross-ventilation keeps wood dry and unappealing to termites. Use vent openings on all sides and make sure nothing blocks airflow.
Install vapor barriers (plastic sheets) on the ground to reduce condensation. This simple step cuts down hidden moisture and also makes inspection easier.
Improper ventilation is a silent risk - you won't see moisture buildup until it's too late. Address it during construction, not as an afterthought.
Step-by-Step Termite Prevention During Construction
Getting prevention right means doing things in the correct order and making sure every step is completed before moving on. Here's a practical breakdown of what to do and when.
Step-by-Step Guide
Learn how to prevent termite infestations in new construction with proven, up-to-date building practices. Follow these steps to protect your property using methods aligned with current industry standards.
Total Time
4 hours 55 minutes
Difficulty
Intermediate
Plan for Termite Prevention Early
Integrate termite prevention into your construction plans at the design stage. Consult with your builder and pest control professionals to select the most effective combination of soil treatments and physical barriers. Early planning reduces costly retrofits and ensures compliance with building codes.
Pro Tips:
- Discuss termite risk during initial design meetings.
- Check local termite zones to select suitable prevention methods.
- Include termite barriers in architectural drawings.
Important Warnings:
- Skipping early planning often leads to expensive remediation and code violations later.
Required Tools:
- Construction blueprints
- Access to building codes
- Consultation with a licensed pest control professional
Treat Soil Before Foundation Work
Apply a termiticide to the soil beneath and around the foundation before pouring concrete. Use products approved by your local regulations and follow label instructions for coverage and concentration. Proper soil treatment forms a chemical barrier that deters subterranean termites.
Pro Tips:
- Apply termiticide to trenches 12-18 inches wide around the perimeter.
- Use a calibrated sprayer for even coverage.
- Schedule inspections to verify complete treatment.
Important Warnings:
- Always wear protective gear when handling termiticides.
- Improper application leaves untreated gaps where termites can enter.
Required Tools:
- EPA-registered termiticide
- Protective gloves and goggles
- Chemical sprayer
- Measuring tape
Install Physical Termite Barriers
Place stainless steel mesh or plastic sheeting termite barriers at critical entry points such as slab penetrations and perimeter walls. Install according to manufacturer specifications to ensure a continuous barrier that physically blocks termite entry.
Pro Tips:
- Overlap barrier seams by at least 6 inches.
- Seal around plumbing and utility penetrations tightly.
- Check that barriers extend fully to the edge of the slab.
Important Warnings:
- Damaged or poorly installed barriers will not stop termites.
- Do not puncture or tear barrier material during installation.
Required Tools:
- Stainless steel mesh or plastic termite barrier
- Utility knife
- Construction adhesive or tape
- Protective gloves
Use Termite-Resistant Materials
Select pressure-treated lumber or naturally termite-resistant wood species (such as cedar or redwood) for framing and ground-contact elements. Use concrete, steel, or masonry in high-risk areas to minimize wood exposure.
Pro Tips:
- Verify lumber is rated for ground contact (AWPA UC4A or higher).
- Store wood off the ground and away from soil before installation.
- Seal all end cuts and joints with approved wood preservative.
Important Warnings:
- Do not use untreated wood in direct contact with soil or concrete.
- Improper wood selection increases long-term termite risk.
Required Tools:
- Pressure-treated lumber or resistant wood
- Wood preservative
- Saw
- Brush for sealant
Maintain Proper Drainage and Clearance
Grade soil to slope away from the foundation and maintain at least 6 inches of clearance between soil and wood components. Install gutters and downspouts to direct water away. These steps reduce moisture, making conditions less attractive for termites.
Pro Tips:
- Verify final soil grade slopes at least 5% away from structure.
- Extend downspouts 4-6 feet from foundation.
- Keep mulch and vegetation 12 inches from exterior walls.
Important Warnings:
- Soil or mulch in contact with wood encourages termite bridges.
- Poor drainage increases both termite and structural risks.
Required Tools:
- Shovel
- Level
- Gutter system with downspouts
- Measuring tape
Schedule Professional Inspections
Arrange for a licensed pest control professional to inspect the site after construction and annually thereafter. They will confirm that all barriers, treatments, and clearances remain effective, catching potential issues early.
Pro Tips:
- Request a written inspection report detailing any vulnerabilities.
- Set up yearly inspections as part of property maintenance.
- Follow up promptly on any recommendations.
Important Warnings:
- Missing annual inspections increases the likelihood of undetected termite activity.
- Only use licensed and insured pest professionals for inspections.
Required Tools:
- Contact information for a licensed pest inspector
- Access to all foundation and crawlspace areas
Timeline: When to Apply Each Prevention Method
Soil treatment comes first - right after final grading but before setting forms or trenches for the foundation. This is your window to reach undisturbed soil and ensure a complete barrier.
Physical barriers like mesh or shields are next, installed during the foundation and framing stages. Any missed area is a potential weak spot, so double-check before pouring concrete or closing up walls.
Material selection - using treated wood or borate-laced products - should be part of every framing and ground-contact decision. Moisture controls, like vapor barriers and ventilation, start once the foundation is set and continue into final inspection.
Coordinating with Contractors and Inspectors
Clear communication is crucial. Contractors sometimes skip steps or use cheaper materials if they don't understand why termite prevention matters. Give them written instructions and specify which products to use where.
Document every treatment and barrier installed. Photographs, product labels, and receipts help prove compliance for warranties and future buyers. If the contractor isn't familiar with termite risks in your area, bring in a specialist for a walkthrough before closing up the frame.
Never assume everyone on site understands your prevention plan. Oversee the process or assign someone who does - small oversights here lead to big bills later on.
Common Mistakes That Lead to Future Infestations
Even good prevention plans can fail if a few simple - but costly - mistakes slip through. Knowing where most builds go wrong helps you avoid expensive repairs down the line.
Skipping Soil Treatment or Using Low-Quality Chemicals
Trying to save a few bucks by skipping soil treatment or choosing bargain-basement chemicals is a classic error. Many DIY kits don't meet local code or provide the full coverage needed for new builds.
Incomplete application - like missing a corner or not treating the entire perimeter - leaves gaps. Termites only need one missed section to invade. Some fast-degrading chemicals provide only months of protection, so always check the label for multi-year efficacy and approved use in your state.
Ignoring Post-Construction Landscaping Risks
Once the house is finished, don't let landscaping undo your prevention work. Planting trees, shrubs, or ground cover too close to the foundation creates moisture pockets and root pathways for termites to find their way in.
Mulch, wood chips, and leftover construction debris are prime termite nesting spots. Keep all organic materials at least 12-18 inches from the foundation and never pile firewood or garbage against the house.
Major landscaping changes - like digging new beds or adding irrigation - can damage installed barriers or expose untreated soil. Always check your original termite protection plan before making big changes outside.
Budgeting for Termite Prevention in 2026
Termite prevention isn't the cheapest line item in your new build, but it's one of the most cost-effective over the life of the home. Here's how to think about costs and where to get the best value.
Cost Breakdown: Materials, Labor, and Ongoing Maintenance
Soil treatments usually add between $500–$2,000 to the initial build, depending on home size and local rates. Physical barriers and termite-resistant materials cost 10–20% more than standard options but pay off by reducing the risk of major repairs.
Don't forget about ongoing costs - most warranties require annual or biannual inspections, and some chemical barriers need reapplication every 5-10 years. Factor these into your long-term maintenance plans.
When you compare this to the price of structural repairs (often in the tens of thousands), it's a reasonable investment for peace of mind.
Where to Invest for Best Long-Term Value
Prioritize prevention in high-risk areas: the foundation, crawl space, and any spot where wood meets soil. If budget is tight, focus on these before upgrading other features.
Quality counts - skimping on materials or labor leads to gaps that termites will exploit. If you can't afford full protection everywhere, ask your contractor about phased implementation or partial upgrades, but understand the trade-offs.
Upfront investment is almost always cheaper than trying to fix a problem after it appears.
Frequently Asked Questions About Termite Prevention
❓ Frequently Asked Questions
What is termite prevention in new construction?
What is termite prevention in new construction?
Termite prevention in new construction involves using building techniques and materials to deter termites from infesting a property. This helps protect structural integrity and reduce costly repairs. Common methods include treating the soil with termiticides, installing physical barriers, and using termite-resistant building materials.
How do I prevent termites during the construction of a new home?
How do I prevent termites during the construction of a new home?
To prevent termites during new home construction:
- Treat the soil with a liquid termiticide before pouring the foundation
- Install physical barriers such as stainless steel mesh or sand around foundations and pipe penetrations
- Use termite-resistant materials like pressure-treated wood
- Seal all cracks and utility entry points
- Schedule post-construction inspections
Tip: Early prevention is more effective and cost-efficient than later treatment.
Which materials are best for termite-resistant construction?
Which materials are best for termite-resistant construction?
For termite-resistant construction, prioritize materials such as:
- Pressure-treated wood: contains chemicals that deter termites
- Concrete: does not provide food or entry
- Steel framing: immune to termite damage
- Brick or masonry: highly resistant
Using these materials in critical areas reduces long-term termite risk. However, regular inspections remain necessary.
What is the difference between chemical and physical termite barriers?
What is the difference between chemical and physical termite barriers?
Chemical barriers use termiticides applied to soil or structural elements to kill or repel termites. Physical barriers, such as stainless steel mesh or crushed rock, block termites from entering the structure. Chemical barriers require periodic reapplication, while physical barriers offer long-term protection but may have higher upfront costs.
How often should termite prevention treatments be reapplied in new homes?
How often should termite prevention treatments be reapplied in new homes?
Most soil-applied termite treatments last 5–10 years, depending on the product and soil conditions. Annual inspections are recommended to monitor for signs of termite activity. If evidence of termites or barrier breakdown is found, retreatment should be done immediately to maintain protection.
What should I look for when choosing a termite control company for new construction?
What should I look for when choosing a termite control company for new construction?
When choosing a termite control company for new construction, focus on:
- State licensing and insurance: ensures compliance
- Experience with new builds: specialized techniques required
- Use of EPA-registered products: safety and effectiveness
- Written warranty: coverage for retreatments
- Verified customer reviews: reliability
Always compare at least three companies before signing a contract.
Why is termite prevention important in new construction?
Why is termite prevention important in new construction?
Termite prevention in new construction is crucial because termites can cause extensive structural damage that often goes undetected until costly repairs are needed. Early prevention reduces long-term maintenance expenses and protects property value. Building codes in many regions now require termite protection measures for all new homes.
Key Takeaways for Termite-Proof New Construction
Termite prevention in new construction is about being proactive, not reactive. Using the right materials, applying soil treatment at the right time, and installing physical barriers all work together to keep termites out for the long haul.
If you ever spot suspicious mud tubes, hollow-sounding wood, or unexplained moisture near the foundation, call a pro for a termite inspection right away. Document every prevention measure you took - it can help with warranty and insurance claims down the line.
Early detection and action are your best friends. The sooner you address a problem, the cheaper and less invasive the fix will be.
Related Articles

Best Termite Treatments and Baits 2026: Expert Picks for DIY Control
Best termite treatments and baits for 2026. Compare top-rated liquid barriers, bait stations, sprays, and natural solutions for effective DIY termite control.

Best Carpenter Ant and Wood Borer Treatments 2026: Top Baits, Sprays, and Safe Solutions
Discover the best carpenter ant treatments and wood borer control products for 2026. Compare effective baits, sprays, natural solutions, and expert tips to eliminate pests and protect your home - DIY-friendly and budget-conscious.

Complete Guide to Pest Prevention in Homes: Stop Pests in 2026
Protect your home in 2026 with this complete pest prevention guide. Discover proven DIY methods, room-by-room tips, safe solutions for families, and expert advice to stop pests before they start.
![Best Protective Gear for Pest Control 2026 [Expert Reviews]](https://pestproreviews.com/images/hero/hero_best_protective_gear_for_pest_control_2026_expert.webp)
Best Protective Gear for Pest Control 2026 [Expert Reviews]
Protect yourself during DIY pest control in 2026 with our expert-reviewed guide to the best protective gear. Compare top-rated respirators, gloves, coveralls, and more for safe, effective pest removal at home.