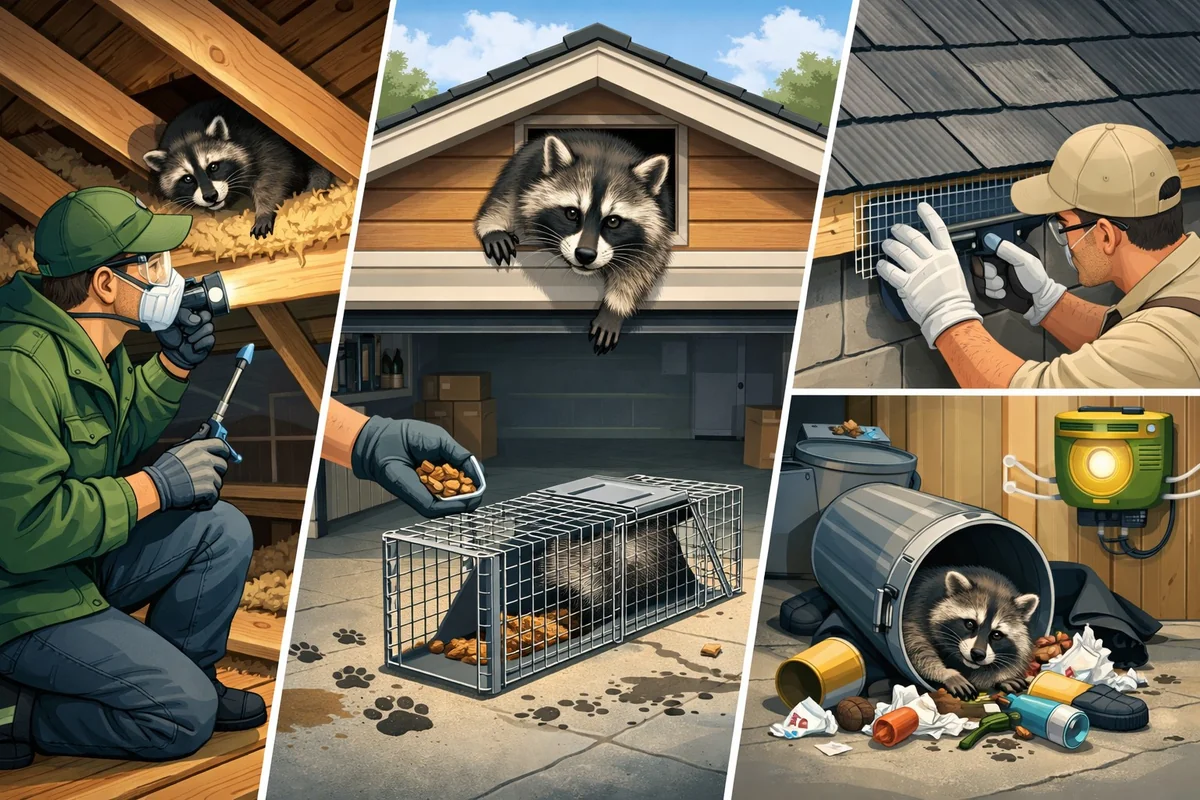

How to Get Rid of Raccoons in Attics and Garages (DIY Guide 2026)
Learn how to get rid of raccoons in your attic or garage with safe, effective DIY steps. Discover signs of infestation, removal methods, prevention tips, and legal considerations for 2026.
To get rid of raccoons in your attic or garage, identify all entry points, use humane eviction or trapping methods, and thoroughly seal and clean the area. The process usually takes 3-7 days and requires basic tools, protective gear, and strict attention to safety and local laws. Don’t seal gaps until all raccoons are gone.
How Raccoons Invade Attics and Garages
Raccoons are relentless when it comes to finding shelter. If you’re hearing thumping overhead or noticing odd messes in your garage, you’re dealing with an animal that’s extremely dexterous - think of them as furry burglars with thumbs.
Common Entry Points and Weak Spots
Most raccoons enter attics and garages through roof vents, soffits, loose siding, or gaps around garage doors. They’re surprisingly strong and can tear through thin wood, plastic, or aluminum vents with ease. Don’t underestimate their ability to manipulate latches or squeeze through gaps as small as 4 inches.
A simple visual inspection may not reveal all entry points. Raccoons favor hidden spots - behind gutters, under loose shingles, or tucked under eaves. Thin materials are no match; a determined raccoon will chew or pry through anything except heavy-gauge metal or reinforced hardware cloth.
That’s why durable repairs matter.
Why Attics and Garages Attract Raccoons
Attics and garages offer warmth and shelter, especially during cold or wet months. Insulation is an invitation for nesting. If you store pet food, birdseed, or accessible garbage in these areas, raccoons will stick around - unlike rodents, they can open lids and containers easily.
Low human traffic makes things worse. Raccoons are smart enough to know when a space is rarely visited, so they’ll settle in and raise young if left undisturbed. This makes garages and attics prime real estate for these animals compared to other pests.
For a broader look at wildlife issues - including related animals like opossums - see our Raccoon & Opossum Control overview for tips and prevention strategies.
Signs You Have Raccoons in Your Space
Suspect you have a raccoon problem? Rely on more than just noise. Raccoons leave clear evidence - if you know what to look for.
Noises and Physical Evidence
Raccoons are nocturnal and much louder than mice or squirrels. If you hear heavy thumping, rolling, or scratching at night, odds are high you’ve got a raccoon, not a rodent. Scratching or dragging sounds in the walls or above the ceiling are classic signs.
Look for droppings - raccoon scat is 2-3 inches long, blunt at both ends, often found in piles. Paw prints (five toes, like a small human hand) and shredded insulation or cardboard are common. Damaged insulation, chewed wires, or torn ductwork are bigger red flags - raccoons often rip through these while making nests or finding food.
Odors and Health Risks
A strong, musky, or ammonia-like smell is a sign of raccoon urine and feces. Their waste can permeate insulation and linger even after the animals are gone. Worse yet, raccoon feces can contain roundworm eggs, posing a real health risk to humans and pets if disturbed during cleanup.
Odors don’t vanish with the raccoons - you must remove all contaminated material and disinfect thoroughly or the smell (and the risk) will stick around.
Safety Precautions Before You Start Removal
Getting rid of raccoons is not a casual weekend project. Protect yourself, your family, and the animals by following strict safety and legal guidelines.
Personal Safety and Protective Gear
Wear heavy-duty gloves, an N95 mask, and eye protection when inspecting or cleaning infested areas. Raccoon droppings and insulation dust can transmit diseases like leptospirosis and raccoon roundworm. Long sleeves, pants, and boots reduce your risk of scratches or exposure to parasites.
Never handle raccoons directly - rabies risk is real, even if the animal seems calm or sluggish. If you’re bitten or scratched, seek medical attention immediately.
Legal and Ethical Considerations
Local laws on raccoon removal vary widely. Some cities and states restrict trapping, relocating, or killing raccoons without a wildlife control license. In many regions, humane removal is required, and relocating raccoons more than a mile or two away is illegal or inhumane.
Penalties for unlawful removal can include fines or forced professional intervention. Always check your area’s rules before setting traps or exclusion devices.
Tools and Materials Needed for Raccoon Removal
You’ll need more than a flashlight and hope. Here’s what actually works for raccoon attic and garage problems.
Essential Supplies Checklist
- Live traps: Humane box traps sized for raccoons (minimum 10”x12”x32”)
- Heavy-duty gloves and PPE: Protects against bites, scratches, and contaminated material
- Galvanized metal mesh/hardware cloth: For sealing holes and reinforcing weak spots
- Exterior-grade sealant: Closes small gaps and cracks
- Bright flashlight or headlamp: Essential for attic and garage inspection
- Enzyme cleaner and disposable bags: For cleaning and safe disposal of waste
Optional Tools for Challenging Cases
- Trail cameras: Monitor for raccoon activity when animals are elusive or trap-shy
- One-way exclusion doors: Let raccoons exit but not re-enter; best for hard-to-reach nests
- Ultrasonic repellents or motion-activated lights: Mixed results as standalones but can boost other methods
See our Best Raccoon Traps and Deterrents 2026 guide for expert picks, setup advice, and latest user feedback as of 2026.
| Method | ★Difficulty Level | ★Time Required | Cost Range | ★Best For | Effectiveness |
|---|---|---|---|---|---|
| Exclusion with One-Way Door | Medium | 3-5 hours (including installation and monitoring) | Moderate | Homeowners comfortable with light carpentry; effective for small infestations | Very High |
| Live Trapping and Relocation | Hard | 1-2 days (setup, checking, and relocation) | Premium | Advanced DIYers or those with persistent raccoons; requires adherence to local regulations | High |
| Repellents and Deterrents | Easy | 1-2 hours (application and setup) | Budget-friendly | Quick, temporary relief or for small, low-traffic spaces under 500 sq ft | Moderate |
| Habitat Modification and Sealing Entry Points | Medium | 4-6 hours (inspection, repairs, sealing) | Moderate | Long-term prevention; ideal after removal to prevent re-entry | Excellent |
Step-by-Step Guide to Removing Raccoons
Ready to tackle the problem? Here’s the process that consistently gets results for homeowners - without cutting corners or risking animal suffering.
Step-by-Step Guide
Safely and effectively remove raccoons from attics and garages using best DIY pest control practices. Follow these steps to ensure humane removal, prevent property damage, and reduce future infestations.
Total Time
4 hours 50 minutes
Difficulty
Intermediate
Inspect and Confirm Raccoon Presence
Check for raccoon signs like droppings, damaged insulation, or noises at night. Use a bright flashlight to scan attic and garage corners for nests or entry holes. Identifying raccoon activity confirms the need for removal and directs your next steps.
Pro Tips:
- Look for paw prints around entry points.
- Common mistake: Overlooking hidden nests under insulation.
- Nighttime inspections reveal most activity due to raccoons’ nocturnal habits.
Important Warnings:
- Wear an N95 mask and gloves to avoid exposure to droppings and urine, which may carry disease.
Required Tools:
- Bright flashlight (500+ lumens)
- N95 respirator mask
- Heavy-duty gloves
Locate and Seal Entry Points (Except Main Exit)
Identify all raccoon entry holes and seal all except the main exit using steel mesh or hardware cloth. Leave the main exit open for now. This prevents re-entry while allowing trapped raccoons to leave safely.
Pro Tips:
- Measure openings precisely; gaps over 3 inches can admit raccoons.
- Steel mesh (16-gauge, 1/2-inch) resists chewing better than chicken wire.
- Mark sealed vs. open exits with colored tape for easy tracking.
Important Warnings:
- Do not seal all exits until you’re sure all raccoons are out, to avoid trapping animals inside.
Required Tools:
- Steel mesh (16-gauge, 1/2-inch)
- Tin snips or wire cutters
- Cordless drill with screws
- Colored marking tape
Install a One-Way Exclusion Door
Install a commercial one-way raccoon exclusion door over the main exit. Position the device according to manufacturer instructions so raccoons exit but cannot re-enter. This ensures humane removal without direct confrontation.
Pro Tips:
- Ensure the exclusion door is rated for raccoons (not squirrels or smaller animals).
- Secure all edges tightly—raccoons exploit loose fittings.
- Check the device daily to confirm it remains functional.
Important Warnings:
- Do not attempt to physically handle raccoons—bites can transmit rabies and other diseases.
Required Tools:
- One-way exclusion door (commercial, for raccoons)
- Cordless drill or screwdriver
- Work gloves
Monitor and Confirm Raccoon Departure
Check the exclusion door and entry area for 72 hours, watching for activity or fresh tracks. Use flour or sand outside the exit to detect footprints. Confirm all raccoons have left before fully sealing the last entry point.
Pro Tips:
- Spread a 2-foot patch of flour for clear track detection.
- Motion-sensor cameras provide extra confirmation.
- Raccoons usually exit within 2 nights if undisturbed.
Important Warnings:
- If you hear persistent noises after 72 hours, there may be babies or trapped adults—contact wildlife professionals.
Required Tools:
- All-purpose flour or playground sand
- Motion-sensor wildlife camera (optional)
Clean and Disinfect the Area
Remove all nesting material, droppings, and contaminated insulation. Use a HEPA-filter vacuum and disinfectant rated for animal waste. Proper cleaning eliminates health risks and discourages future raccoon return.
Pro Tips:
- Double-bag all contaminated materials for safe disposal.
- Replace insulation only after thorough cleaning.
- Ventilate the area for at least 2 hours after disinfecting.
Important Warnings:
- Do not sweep dry droppings—this releases hazardous dust. Always use a HEPA vacuum.
- If heavy contamination is present, consider hiring a professional biohazard cleaning service.
Required Tools:
- HEPA-filter shop vacuum
- EPA-registered disinfectant
- Contractor trash bags
- Protective coveralls
Seal All Entry Points Permanently
After confirming raccoon removal, securely seal every potential entry with steel mesh and weatherproof fasteners. Inspect nearby vents, soffits, and rooflines for vulnerable spots. This prevents future infestations and maintains building integrity.
Pro Tips:
- Check for gaps larger than 2 inches—raccoons can exploit small weaknesses.
- Apply weatherproof caulk around mesh edges for extra durability.
- Schedule seasonal inspections to maintain barriers.
Important Warnings:
- Failing to seal all entry points invites recurrence, especially in spring when raccoons seek nesting sites.
Required Tools:
- Steel mesh (16-gauge, 1/2-inch)
- Weatherproof screws
- Caulking gun and weatherproof caulk
Inspect and Locate All Entry Points
Use a powerful flashlight to carefully examine rooflines, attic corners, soffits, and garage edges. Check for hidden holes, loose vents, chewed wood, or pried siding - raccoons can easily slip through 4-inch gaps.
Mark every opening you find, even if it seems too small. Take photos for reference - this makes sealing easier and ensures you don’t miss anything when the animals are gone.
Evict Raccoons Humanely
Install one-way exclusion doors at main entry points. These let raccoons leave at night but prevent them from returning. For temporary deterrence, place ammonia-soaked rags or predator urine near the nest - keep in mind, these are short-term fixes and rarely drive out a determined or nursing mother.
Leave attic lights on and play a loud radio overnight. Light and noise disrupt a raccoon’s sense of security, making the area less appealing for nesting. This approach works best when combined with exclusion doors.
Trap and Remove Remaining Animals
Set humane live traps near entry points or along raccoon travel paths. Bait with marshmallows (safe for pets), canned fish, or cat food. Marshmallows are oddly effective - raccoons love them, and they don’t attract cats or opossums as readily.
Check traps at least twice a day. Extended confinement causes stress and violates most local regulations. Never relocate raccoons far from your property - call your local wildlife agency if unsure about what’s legal or humane in your area.
Seal and Repair All Entry Points
Once all raccoons are out, seal every opening with galvanized metal mesh and exterior-grade sealant. Reinforce weak areas like vents, soffits, and roof edges with hardware cloth or metal flashing. If you’re unsure if animals are gone, use a trail camera or sprinkle flour at the entry - look for tracks.
Never seal an entry while raccoons are still inside. This almost always leads to more damage or animal death.
Clean and Disinfect the Area
Carefully remove contaminated insulation, droppings, and nesting material. Double-bag all waste and follow local disposal rules. Apply an enzyme-based cleaner to all hard surfaces - this breaks down organic matter and eliminates lingering odors better than bleach.
Replace insulation if badly soiled. Lingering scents can attract new raccoons or other wildlife even after you’ve sealed the space.
Comparing Raccoon Removal Methods: Traps, Exclusion, and Repellents
Not all raccoon removal strategies are equally effective - or legal. Here’s what actually works, and when each method makes sense.
Live Trapping Pros and Cons
- Live traps are humane if monitored frequently and used correctly
- Best for single or small numbers of raccoons, or when exclusion isn’t possible
- Requires legal awareness - many areas prohibit relocation or require permits
- Stressful for animals if left too long; always check traps at least twice daily
One-Way Exclusion Doors vs. Trapping
- Exclusion doors let raccoons leave on their own - ideal for family groups or hard-to-reach nests
- Less animal handling, lower risk of injury for both raccoons and humans
- Not safe if young kits are present - separating mother from babies causes suffering and new damage
Repellents and Deterrents: What Works?
- Chemical and scent-based repellents mostly offer short-term relief - not a true solution for established infestations
- Motion-activated lights and sound devices can help deter new arrivals, but rarely force out nesting raccoons
- Repellents are best used as part of a multi-method approach, never as a standalone fix
Mistakes to Avoid When Removing Raccoons
Raccoon removal is full of potential missteps - some costly, others dangerous or even illegal. Avoid these common pitfalls for safer, cleaner results.
Prematurely Sealing Entry Points
This is the most frequent (and damaging) mistake. Sealing holes before all raccoons are gone can trap animals inside your attic or garage, causing frantic escape attempts and new damage.
Trapped raccoons may chew through walls, floors, or even ducts to escape. Always confirm all animals are gone - trail cameras or flour tracking help ensure you’re not sealing anyone in.
Using Ineffective or Unsafe Methods
Poisons and lethal traps are illegal in most areas and pose serious risks to pets, children, and non-target wildlife. Homemade deterrents like mothballs are toxic, rarely effective, and may violate local codes.
Ignoring legal requirements can land you with fines or force a professional intervention. Always check your city or county’s wildlife removal rules before acting.
How to Prevent Future Raccoon Infestations
Once you’ve evicted raccoons, keeping them out is an ongoing task. Prevention comes down to securing your home and removing what attracts them in the first place.
Securing Entry Points and Weak Spots
- Install metal mesh over all vents and reinforce roof edges with hardware cloth
- Inspect rooflines, soffits, and siding twice a year - especially after storms or home repairs
- Use tamper-resistant latches on attic and garage doors to prevent easy opening
Managing Food Sources and Attractants
- Store pet food, birdseed, and garbage in sealed, raccoon-proof containers
- Clean up fallen fruit, compost, or other organic debris near your home
- Feed pets indoors, especially at night - leftover food is a major draw for raccoons
Routine Maintenance and Monitoring
- Conduct biannual attic and garage inspections for signs of wildlife activity
- Install motion-activated cameras if raccoons are a recurring issue
- Educate family and neighbors about raccoon behavior and prevention steps
Frequently Asked Questions About Raccoon Removal
❓ Frequently Asked Questions
What are the signs of raccoons in an attic or garage?
What are the signs of raccoons in an attic or garage?
Common signs of raccoons in attics or garages include loud noises at night, scratching sounds, droppings, damaged insulation, and visible entry holes. Most homeowners notice tracks or overturned trash bins nearby. Recognizing these early helps prevent extensive property damage and costly repairs.
How do I get rid of raccoons in my attic or garage myself?
How do I get rid of raccoons in my attic or garage myself?
To remove raccoons yourself:
- Locate and seal all entry points except one main exit
- Place bright lights and loud radios in the area to disturb them
- Use ammonia-soaked rags near nests as a deterrent
- Set up a one-way exclusion door
- Seal the final exit after they're gone
Wear gloves and avoid direct contact for safety.
What is the difference between raccoon repellents and exclusion methods?
What is the difference between raccoon repellents and exclusion methods?
Raccoon repellents use odors or tastes to discourage animals from staying, offering short-term relief. Exclusion methods physically block access, providing long-term prevention by sealing entry points. Most experts recommend combining both for best results, but exclusion is more effective for lasting protection.
When is the best time to remove raccoons from attics or garages?
When is the best time to remove raccoons from attics or garages?
The best time to remove raccoons is late winter or early spring, before the birthing season begins. Removing them before females have litters helps avoid orphaned young. Evening hours are most effective, as raccoons are active and likely to leave their nests.
What should I look for when choosing a raccoon exclusion product?
What should I look for when choosing a raccoon exclusion product?
When choosing a raccoon exclusion product, consider:
- Material durability: metal mesh resists chewing
- Mesh size: 16-gauge, 1/4-inch mesh blocks entry
- Weather resistance: galvanized or coated for outdoor use
- Ease of installation: pre-cut panels save time
Choose products with positive user reviews for long-term reliability.
How often should I inspect my attic or garage for raccoon entry points?
How often should I inspect my attic or garage for raccoon entry points?
Inspect your attic or garage for raccoon entry points every three to six months, especially in spring and fall. Frequent checks help catch new holes or damage before raccoons settle in. Pay close attention after storms or roof repairs, as these can create vulnerabilities.
Are DIY raccoon removal methods safe for families and pets?
Are DIY raccoon removal methods safe for families and pets?
Most DIY raccoon removal methods are safe when you avoid direct contact and use non-toxic deterrents. Always wear gloves and masks, and keep pets away from traps or exclusion devices. However, avoid chemical repellents indoors, as fumes can cause respiratory irritation in humans and animals.
Why do raccoons target attics and garages?
Why do raccoons target attics and garages?
Raccoons target attics and garages because these spaces offer shelter, warmth, and easy access to food sources like trash or pet food. Attics often provide quiet denning areas for raising young. Sealing entry points and managing attractants can significantly reduce the risk of infestation.
Key Takeaways for Safe and Effective Raccoon Removal
DIY raccoon removal works when you combine thorough inspection, humane eviction or trapping, and strong prevention. Never cut corners on safety or legal compliance - these steps protect both you and the animals.
If you’re dealing with a large group, hidden kits, or persistent re-infestation, don’t hesitate to call a professional. Sometimes, legal restrictions or the complexity of the job demand expert help.
Regular inspections, airtight repairs, and careful management of food attractants will keep your attic and garage raccoon-free. Document your removal steps for your own records or if you plan to sell your home down the line.
Related Articles
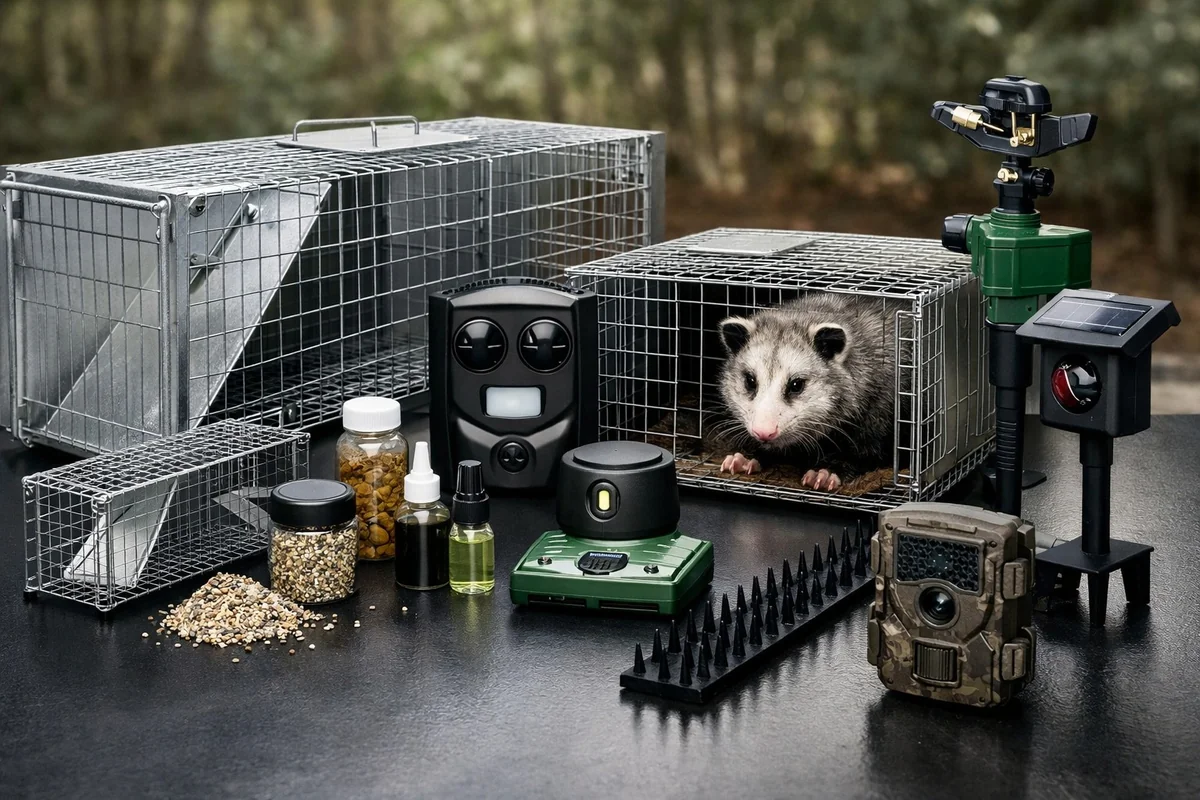
Best Raccoon Traps and Deterrents 2026: Live Traps, Repellents, and Safe DIY Options
Discover the best raccoon traps, deterrents, and opossum traps for 2026. Compare humane live-catch options, electronic repellents, and prevention tools to protect your home quickly and safely - DIY solutions for every budget.
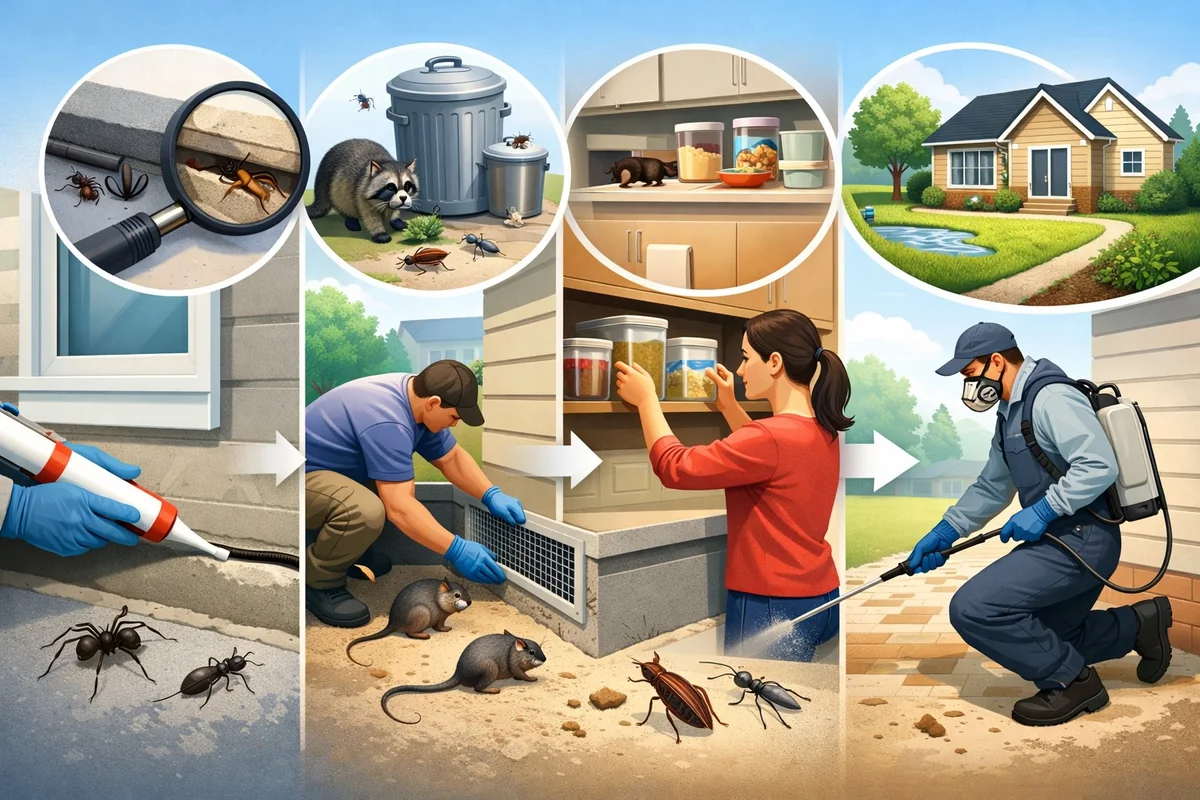
Complete Guide to Pest Prevention in Homes: Stop Pests in 2026
Protect your home in 2026 with this complete pest prevention guide. Discover proven DIY methods, room-by-room tips, safe solutions for families, and expert advice to stop pests before they start.
![Best Protective Gear for Pest Control 2026 [Expert Reviews]](https://pestproreviews.com/images/hero/hero_best_protective_gear_for_pest_control_2026_expert.webp)
Best Protective Gear for Pest Control 2026 [Expert Reviews]
Protect yourself during DIY pest control in 2026 with our expert-reviewed guide to the best protective gear. Compare top-rated respirators, gloves, coveralls, and more for safe, effective pest removal at home.

Guide to Hiring a Professional Pest Control Service: What to Know in 2026
Learn when and how to hire a professional pest control service, what to look for in a company, and how to compare options for safe, effective pest removal in 2026. Includes step-by-step preparation, contract tips, and FAQs.