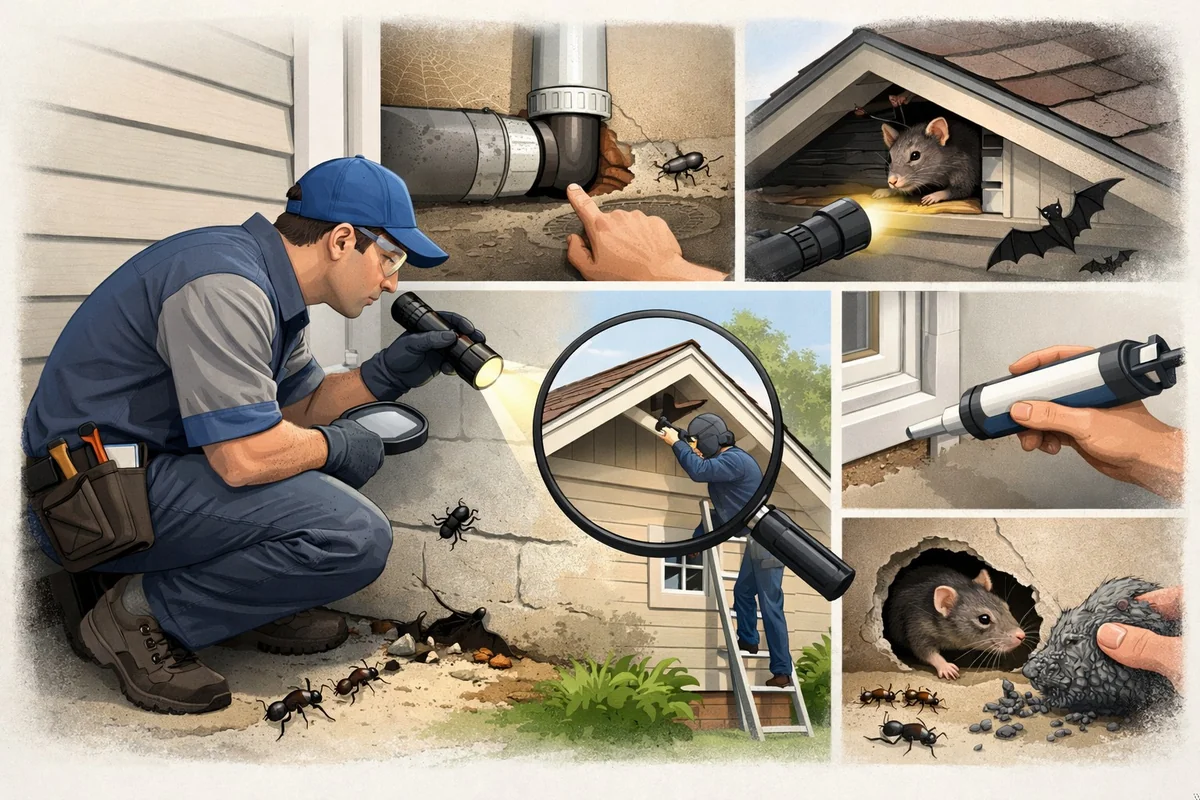

How to Identify Entry Points for Pests: Step-by-Step Home Guide (2026)
Struggling with recurring pests? Learn how to identify pest entry points, find hidden access routes, and pest proof your home with this expert 2026 step-by-step guide. Save money and keep your space safe - no pro required.
To identify pest entry points, inspect your home's foundation, doors, windows, and utility lines for cracks or gaps as small as 1/16 inch. Use a flashlight, mirror, and measuring tape for a thorough check. Sealing these points takes 1-2 hours for most homes, but persistent pests may require extra effort or professional help.
Why Identifying Pest Entry Points Matters
Pest infestations don't just happen overnight. Most start when insects or rodents find small, overlooked openings to slip inside. If you want to actually get rid of pests for good, you need to know where they're getting in - not just fight the ones you see.
Here's the thing: You can spray, bait, or trap all day, but if entry points remain open, new pests will keep coming. Each species looks for different types of gaps - ants love tiny cracks near foundations, while mice squeeze through holes near pipes. That means the entry points you miss decide how quickly things get out of hand.
Impact on Infestation Severity
Leaving entry points unsealed is like leaving your front door wide open. Even after you remove current pests, more will keep coming in. This is why infestations often return within weeks if you only treat visible problems.
Some pests, like German cockroaches, slip in through kitchen and bathroom plumbing gaps, while rodents look for larger holes around vents or siding. Understanding these differences is key to getting ahead of infestations before they become overwhelming - or expensive to fix.
Blocking these entry points doesn't just reduce pest numbers. It also means you can rely less on sprays and poisons, which saves money and is safer for family and pets in the long run.
Prevention vs. Treatment: Cost and Effectiveness
Prevention almost always beats chasing pests after they've moved in. Sealing entry points once is a cost-effective, eco-friendly solution compared to repeat chemical treatments. You avoid the cycle of killing what you see and missing what you can't.
Of course, not all entry points are easy to access. Attics, crawlspaces, or areas behind heavy appliances can be tough to reach and may take more time or special tools. But even partial prevention - sealing what you can - drastically lowers your risk of a recurring infestation.
For a broader look at proactive strategies, see the General Pest Prevention section for more tips that go hand-in-hand with exclusion.
Common Entry Points Pests Use in Homes
The same handful of weak spots show up over and over in our experience. Most homeowners are surprised at how small a gap pests need. Here's what to look for:
Gaps Around Doors and Windows
Weatherstripping and door sweeps take a beating over time. Even a 1/16-inch gap is enough for ants, spiders, and sometimes even juvenile roaches. Check for worn or missing strips, especially on older doors and windows that may have warped frames.
Window screens are another weak link. Tears, holes, or loose frames let mosquitoes and flies in quickly. Homes built before 2000 are especially prone to warped or poorly sealed frames.
Cracks in Foundations and Walls
Concrete, brick, and even wood foundations develop small cracks as they age. Rodents can squeeze through holes as small as 1/4 inch, while insects can use much smaller ones. Foundation vents without screens are basically an open invitation to mice, rats, and cockroaches.
Many of these cracks are hidden behind bushes, mulch, or inside unfinished basements, so they’re easy to miss. If you see pest droppings or signs in your basement, odds are the entry point is nearby.
Utility Penetrations and Vents
Pipes, cables, and dryer vents almost always leave small gaps when installed or repaired. Rodents only need a 1-inch diameter hole (about the size of a quarter) to squeeze through, but insects need even less space.
Some of these utility gaps are fire-sealed in modern homes. If you block them incorrectly, you could violate building codes or create a fire hazard. Always check what type of sealant or barrier you can use safely.
For a full home approach, the Complete Guide to Pest Prevention in Homes details how entry point sealing fits into broader pest management.
Tools and Materials for Inspecting Entry Points
You don’t need fancy gear to find most entry points - but a few basic tools make the job much faster and more thorough. Here’s what to have on hand:
Essential Inspection Tools
- Flashlight: A bright, focused beam shows gaps and cracks in dark corners, crawlspaces, or behind appliances. LED models work best for spotting spider webs or droppings.
- Mirror tool: A small inspection mirror (or even a hand mirror) lets you see under appliances, behind pipes, or into tight spots you can’t reach directly.
- Measuring tape: You’ll need to know the exact size of gaps to choose the right sealant or barrier. Many pests can get through much smaller holes than you’d expect.
Recommended Sealants and Barriers
- Silicone caulk: Flexible, weather-resistant, and excellent for sealing small cracks or gaps around windows, doors, and siding.
- Steel wool: Rodents can’t chew through it, so it’s ideal for plugging holes around pipes or in wall cavities. Cover with caulk to keep it in place.
- Expanding foam: Great for filling irregular gaps, but keep in mind rodents can chew through it - only use for insects or reinforce with mesh for rodents.
Step-by-Step Guide to Finding Entry Points
Finding pest access points isn’t difficult, but a systematic approach makes a big difference. The right preparation and process will save you hours of frustration - and catch gaps you’d otherwise miss.
Preparing for Inspection
Inspect your home’s exterior during daylight to spot gaps, and check indoors for light leaks at night. Gloves and a dust mask are a good idea in crawlspaces or attics - these areas often have pest droppings or loose insulation.
Keep a notepad or use your phone to record each entry point’s location and size. This log is invaluable for tracking which areas you’ve fixed and which still need attention.
Step-by-Step Guide
Identify pest entry points in your home efficiently and safely. Follow these practical steps to inspect, detect, and document common access points using modern best practices for lasting pest prevention.
Total Time
45 minutes
Difficulty
Beginner
Gather Your Inspection Tools
Collect all necessary tools before starting. Use a bright LED flashlight to spot small gaps and a notepad or smartphone to document findings. This step ensures you avoid interruptions and inspect efficiently.
Pro Tips:
- Choose a flashlight with at least 300 lumens for outdoor visibility.
- Use a marker to highlight entry points as you go.
- Wear gloves to protect against sharp edges or debris.
Important Warnings:
- Do not use a damaged ladder—falls are a leading cause of home inspection injuries.
Required Tools:
- LED flashlight (300+ lumens)
- Sturdy ladder (meets ANSI standards)
- Notepad or smartphone
- Work gloves
Inspect Exterior Walls and Foundation
Walk around your home's exterior and shine your flashlight along the base of walls and foundation. Check for cracks larger than 1/8 inch, missing mortar, or gaps where pipes enter. Mark any potential entry points for later repair.
Pro Tips:
- Inspect after rain—moist soil may reveal fresh pest tunnels.
- Check utility penetrations (pipes, cables) closely.
- Photograph each issue for reference.
Important Warnings:
- Watch for loose soil or hidden holes near foundation—these often indicate burrowing pests.
Required Tools:
- LED flashlight
- Marker or colored tape
- Measuring tape
Check Doors, Windows, and Vents
Examine all doors, windows, and vents for visible gaps, damaged screens, or worn weatherstripping. Measure any gap wider than 1/16 inch - a common threshold for ant and rodent entry. Record locations needing new seals or repairs.
Pro Tips:
- Close doors and look for light seeping through edges.
- Test window screens for tears by gently pressing with your finger.
- Inspect dryer and attic vents for missing covers.
Important Warnings:
- Common mistake: Overlooking attic vents—these are frequent squirrel and bird entry points.
Required Tools:
- Measuring tape
- LED flashlight
- Notepad or smartphone
Inspect Roof, Eaves, and Attic Access
Use a ladder to visually scan your roofline, eaves, and attic openings. Look for loose shingles, gaps at fascia boards, and openings larger than 1/4 inch. Check attic doors for improper seals. Mark any issues for prompt repair.
Pro Tips:
- Sunny days make gaps easier to spot from below.
- Listen for animal sounds in attic spaces.
- Pro tip: Binoculars can help scan hard-to-reach roof areas.
Important Warnings:
- Never climb on a roof alone or in wet conditions—slips are a serious hazard.
- If you see signs of large animal nests, contact a licensed pest professional.
Required Tools:
- Sturdy ladder
- Binoculars (optional)
- LED flashlight
- Work gloves
Inspect Interior Baseboards and Utility Areas
Move to the interior and check baseboards, under sinks, behind appliances, and around utility lines. Use your flashlight to spot gaps or holes as small as 1/8 inch. Document any droppings, chew marks, or drafts - these are signs of pest activity.
Pro Tips:
- Pull appliances away from walls to check behind them.
- Check under sinks for gaps around plumbing.
- Use a mirror to look behind tight spaces.
Important Warnings:
- Wear gloves when reaching behind appliances to avoid sharp edges or rodent residue.
Required Tools:
- LED flashlight
- Mirror (small handheld)
- Work gloves
- Notepad or smartphone
Document and Prioritize Repairs
Review all marked entry points and create a prioritized repair list. Rank openings by size and visible pest activity. Schedule repairs immediately - delays increase infestation risk. For major structural gaps or active nests, consult a professional pest control service.
Pro Tips:
- Seal gaps under 1/4 inch with silicone caulk; use steel wool for larger holes.
- Update your list as repairs are completed.
- Schedule follow-up inspections every 6 months.
Important Warnings:
- If you detect signs of termites or large infestations, do not attempt DIY repair—professional assessment is critical.
Required Tools:
- Notepad or smartphone
- Pen or marker
Systematic Room-by-Room Inspection
Start at ground level and work your way up, moving around each exterior wall and then checking interior rooms. Kitchens, bathrooms, and utility rooms are hotspots because of plumbing penetrations.
Look for pest signs: droppings near baseboards, gnaw marks, or insect wings are strong clues that an entry point is nearby. Pay extra attention behind appliances and under sinks - these are common but often overlooked.
Testing Suspected Entry Points
At night, shine a flashlight inside toward suspicious gaps - if you can see light from outside, pests can get in. For doors and windows, slide a piece of paper under the frame; if it moves with air flow, you have a gap.
Sprinkling a little talcum powder near suspected points and checking for tracks or disturbed powder in the morning is a simple but effective test for active pest traffic.
Recognizing Pest-Specific Entry Signs
Different pests leave different clues at their entry points. Spotting these signs helps you focus efforts where they matter most - and often tells you what kind of pest problem you’re facing.
Rodent Entry Indicators
- Grease marks on walls or floor edges mean rodents are squeezing through repeatedly. Gnaw marks on wood or plastic are another giveaway - they chew to widen or maintain openings.
- Droppings clustered near baseboards, under sinks, or behind stoves usually point to active rodent routes. Mice leave 1/8-inch pellet droppings; rats leave 1/2-inch capsules.
- Chewed insulation, shredded paper, or exposed wires in attics or wall cavities often means rodents are nesting nearby. Always check for new holes or tunnels in these areas.
Insect Entry Clues
- Ant trails usually start at tiny cracks near the foundation or window sills. Follow the line - they almost always lead directly to a gap or hole.
- Termite mud tubes are pencil-thin tunnels along exterior walls or basement joists. If you break a tube and it’s rebuilt within a day or two, termites are active.
- Wasps and bees often enter through attic vents or roof gaps. Look for visible nests, paper-like debris, or dead insects near these areas.
How to Safely Seal and Block Entry Points
Once you’ve found the entry points, sealing them correctly is what keeps pests out for good. The right material and application method matter - do it wrong, and you’ll be back at square one next season.
Choosing the Right Sealant or Barrier
- Silicone caulk works best for cracks under 1/4 inch wide - doors, windows, siding, and small foundation gaps.
- Steel wool or steel mesh paired with caulk is the standard for rodent holes. It blocks chewing and keeps air and insects out.
- Door sweeps and new weatherstripping are ideal for movable gaps under doors. Install these on all exterior doors, including garage and basement entries.
Application Tips for Long-Lasting Results
- Clean surfaces of dust, grease, or loose debris before sealing. This ensures the caulk or foam sticks and lasts.
- Apply sealants in dry weather - moisture can cause poor adhesion and gaps to reopen.
- After sealing doors or windows, check for smooth operation. If anything sticks or binds, carefully trim excess material to avoid damage.
Common Mistakes When Identifying Entry Points
Even experienced homeowners miss entry points sometimes. The most common errors come from skipping certain areas or underestimating what pests can do.
Overlooking High or Hidden Areas
- Attics, rooflines, and soffits are frequent access points for squirrels, bats, and even birds. These spots are often out of sight, so use a ladder and flashlight to check thoroughly.
- Cabinets under sinks and behind appliances hide small insect entryways. If you see droppings or dead pests nearby, pull appliances out and inspect closely.
- Garage doors and attached sheds are easy to skip but are prime access points for mice and larger pests. Check the weather seal and the corners where the door meets the ground.
Misjudging Gap Sizes
- Many people assume a gap is too small for pests. Mice only need 1/4 inch, and cockroaches often squeeze through even less. If you can slide a pencil into a crack, it's big enough for most pests.
- Expanding foam looks like a fix, but rodents can often chew through or dislodge it unless it's reinforced with mesh or steel wool.
- Ignoring small gaps or only focusing on the biggest holes is a sure way to have repeat infestations.
Expert Tips for Thorough Pest Proofing
Getting entry point sealing right isn’t a one-time job. Seasonal changes, weather, and home repairs can create new access points or reopen old ones. Here’s how to stay ahead:
Seasonal Inspection Strategies
- Check foundations and exterior walls after winter - freeze-thaw cycles expand small cracks and create new ones.
- Spring and fall are peak seasons for pest migration indoors. Schedule full inspections during these times, or after major storms that can shift soil and expose new gaps.
- After any renovation or major repair, double-check all affected areas for unsealed utility penetrations or disturbed barriers.
When to Call a Professional
- Structural damage, like shifting foundations or crumbling masonry, is best left to pros. These repairs often require permits and specialized materials.
- If you’ve sealed every gap you can find but pests keep returning, there’s probably a hidden access point in an inaccessible wall, attic, or crawlspace. Professionals use thermal cameras and other specialized tools for detection.
- Termite infestations, or any pest requiring chemical barriers inside walls or soil, usually need pro treatment for legal and safety reasons.
Frequently Asked Questions About Pest Entry Points
❓ Frequently Asked Questions
What is an entry point for pests?
What is an entry point for pests?
An entry point for pests is any opening or gap in your home’s structure that allows insects or rodents to enter. Sealing these areas helps prevent infestations. Common examples include gaps around windows, under doors, and utility line penetrations.
How do I identify entry points for pests in my home?
How do I identify entry points for pests in my home?
To identify pest entry points in your home:
- Inspect exterior walls for cracks or holes, especially near the foundation
- Check around windows, doors, and vents for gaps
- Examine utility pipes and cable entry areas
- Look for damaged weather stripping
- Use a flashlight to spot hidden gaps.
Sealing even small openings is key.
What tools do I need to find and seal pest entry points?
What tools do I need to find and seal pest entry points?
Basic tools for detecting and sealing pest entry points include:
- Flashlight: for spotting gaps in dim areas
- Caulk and caulking gun: for sealing cracks
- Steel wool: blocks rodents in small holes
- Weatherstripping: seals door and window gaps
- Measuring tape: ensures accurate coverage.
Use gloves for safety during repairs.
How often should I check my home for pest entry points?
How often should I check my home for pest entry points?
Experts recommend checking your home for pest entry points at least twice a year - ideally in spring and fall. Seasonal inspections help catch new gaps caused by temperature changes or settling. High-risk areas like basements and attics should be checked more frequently, especially after storms or renovations.
What types of pests are most likely to enter through small gaps?
What types of pests are most likely to enter through small gaps?
Small gaps in a home are most commonly used by ants, cockroaches, spiders, and mice. Mice can squeeze through holes as small as 1/4 inch. Even well-sealed homes can be vulnerable if gaps are overlooked, especially near utility lines and foundation cracks.
Which areas of the home are most vulnerable to pest entry?
Which areas of the home are most vulnerable to pest entry?
The most vulnerable areas for pest entry include:
- Gaps around doors and windows
- Foundation cracks
- Attic vents and soffits
- Dryer and exhaust vents
- Utility pipe entry points.
Regularly inspecting these locations reduces the risk of infestation, especially in older or poorly maintained homes.
What should I look for when choosing pest-proofing products?
What should I look for when choosing pest-proofing products?
When choosing pest-proofing products, focus on:
- Material durability: metal mesh and silicone caulk last longer than basic foam
- Ease of application: user-friendly products save time
- Weather resistance: needed for outdoor use
- Compatibility: match size/type to the gap
Read user reviews to verify effectiveness for your specific pest issue.
Key Takeaways for Effective Pest Entry Control
Effective pest proofing starts with a thorough inspection and ends with sealing every accessible gap - no matter how small. Regular, seasonal checks catch new entry points before pests move in again.
Track repairs and re-inspect known problem areas. This creates a record to spot patterns and catch issues early. Incorporating pest entry checks into routine home maintenance is the most reliable way to keep infestations from returning.
If persistent pests defeat your efforts, don’t give up. A professional inspection can find what you missed and help you finally reclaim your space.
Related Articles
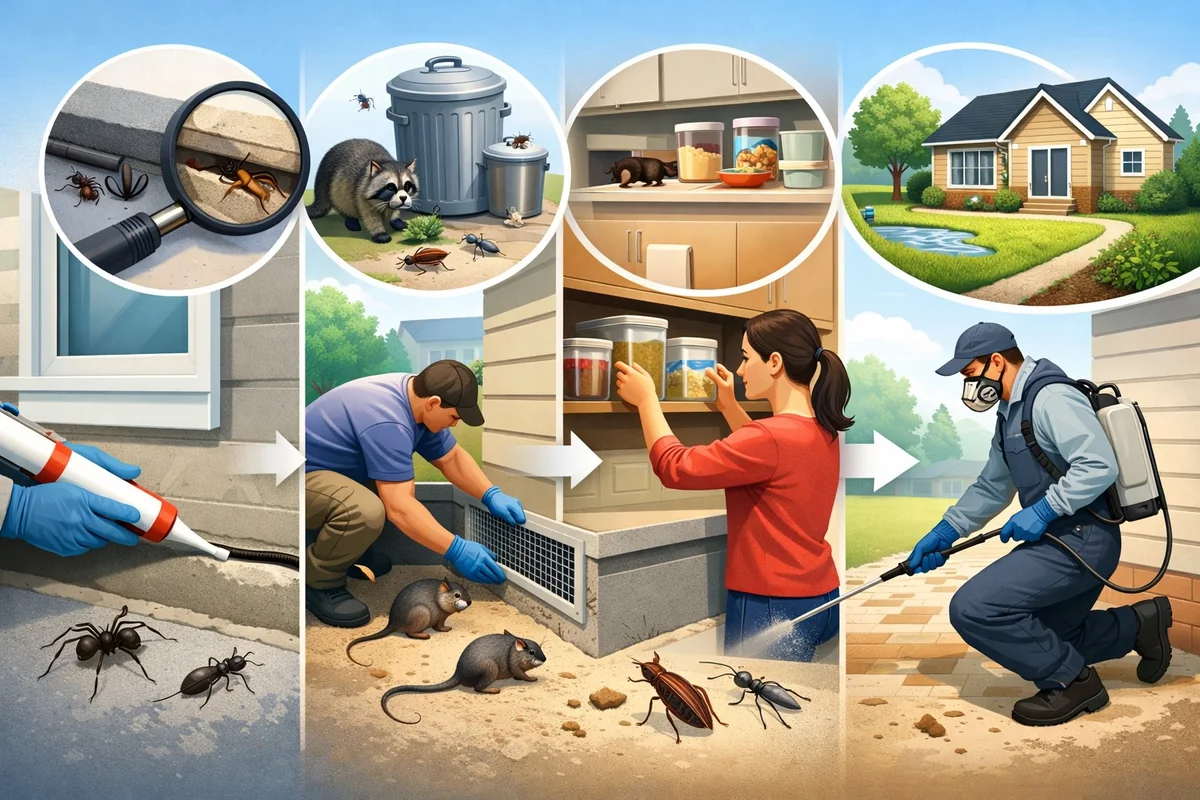
Complete Guide to Pest Prevention in Homes: Stop Pests in 2026
Protect your home in 2026 with this complete pest prevention guide. Discover proven DIY methods, room-by-room tips, safe solutions for families, and expert advice to stop pests before they start.

Guide to Identifying Household Pests: Spot, Compare, and Act on Common Pest Signs in 2026
Learn how to identify household pests quickly and accurately with our 2026 step-by-step pest identification guide. Spot common pest signs, compare DIY and professional methods, and take control of your home without costly exterminators.

Best Rodent-Proofing Materials and Products 2026: Steel Wool, Mesh, Kits, and More
Find the best rodent-proofing materials, products, and exclusion kits for 2026. Compare steel wool, mesh, sealants, vent covers, and natural deterrents to keep your home rodent-free with expert DIY recommendations.

Complete Guide to Pest Control Maintenance: Upkeep Tips & Ongoing Management 2026
Learn how to keep your home pest-free with our complete pest control maintenance guide. Discover expert pest upkeep tips, safe DIY solutions, and step-by-step ongoing pest management strategies for 2026.